Indian Air Force MiG-21MF Eduard 1:48

mig-21-peter-hamann_issue2_chipping_71

The Mig-21 needs no introduction. This sleek but sturdy Cold War stalwart has served with roughly 60 countries and has been taking to the skies around the world for roughly 60 years. Among the operators to have flown the Mig-21 into combat, and one which continued to fly the latest version of the needle-nosed Mig well into the new millennium, is the Bharatiya Vayu Sena, also known as the Indian Air Force. To meet the camouflage needs of diverse regions of operation, the IAF sometimes overpainted the standard Soviet era air superiority gray with more locally suited camouflage schemes, which were prone to heavy chipping and flaking off.  Replicating a finish like this can be challenging due to the layered effect of the original gray with the original airframe markings with years of operational weathering, overpainted camo, and finally the added on national markings over the new camouflage. Luckily it’s just a matter of planning your step-by step approach carefully, and working in the same sequence as the full scale operators. You can also take advantage of several basic weathering techniques and products to simplify the task. For this article I built the excellent Eduard Mig-21 MF with several Eduard Brassin sets. The exquisite fit of both the kit and the accesories greatly simplified the build and finishing process.

Quickboost parts were used throughout the build.

img_5508-copy

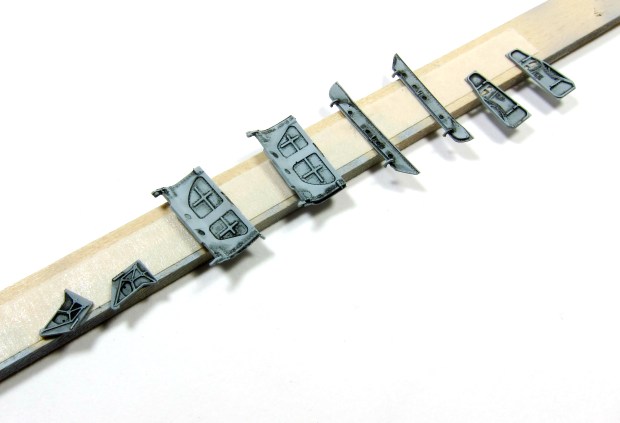
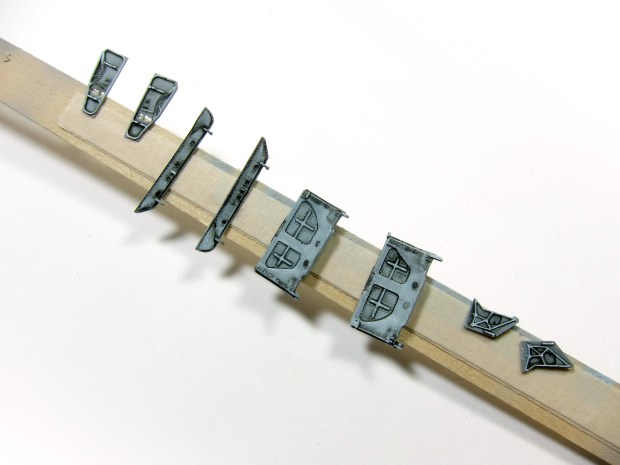
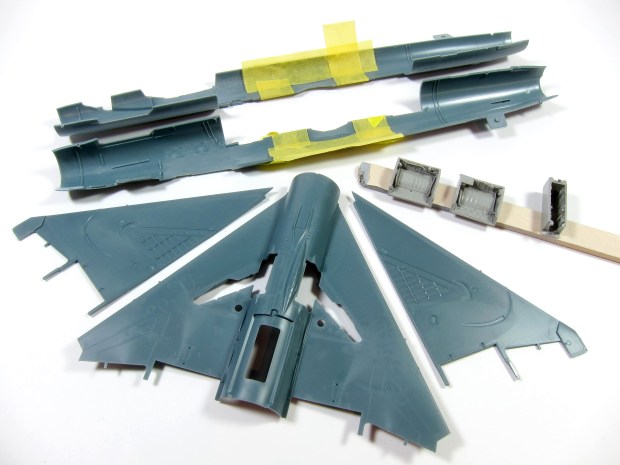
Construction begins with the wheel well parts.
mig-21-peter-hamann_issue2_chipping_01

Painting the wheel well parts and areas of the fuselage with the airframe aluminum that will be revealed using basic hairspray chipping. After the aluminum was dried and buffed lightly with a cotton cloth, A heavy layer of hairspray was applied and just barely allowed to dry. After that, the green zinc chromate seen in reference photos was mixed from Tamiya paints, thinned with Tamiya X-20 thinner, lightly sprayed and allowed to dry. I then dabbed the area with a wet brush and lightly chipped the area with the same brush.

mig-21-peter-hamann_issue2_chipping_02

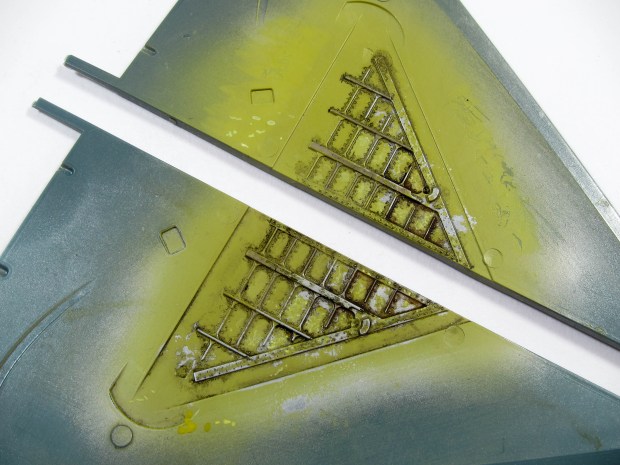
Here, the Wing areas of the wheel wells have been chipped using the hairspray technique. After the chipped green had dried, I added a pin wash of Ammo A.MIG-008 DARK WASH with a fine brush to highlight details and replicate the appearance of accumulated dirt and oil.
mig-21-peter-hamann_issue2_chipping_03

In this photo the resin wheel well parts have received a similar treatment using the appropriate colors for the main wheel wells. After the first pin wash, certain lines and hoses were painted with the colors seen in reference photos, then lightly washed with the same Ammo A.MIG-008 DARK WASH around the connectors and fittings. Keeping the wash localized to the fittings and connectors ensures that the colored areas remain bright and vivid.

mig-21-peter-hamann_issue2_chipping_04

Brassin metal landing gear were used to replace the kit gear.

img_5525

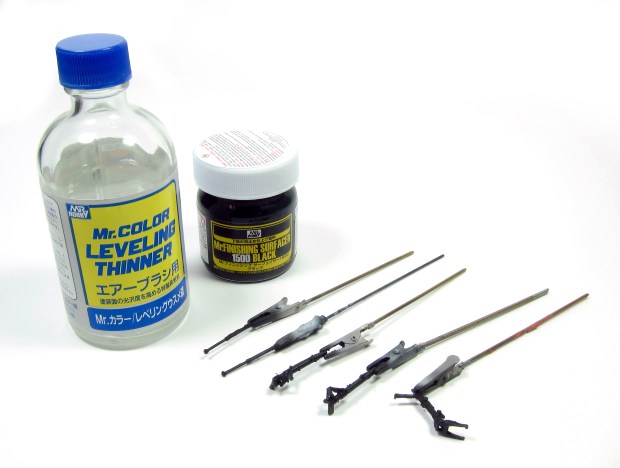
The Brassin gear were primed with Gunze Mr Surfacer Black.
img_6508

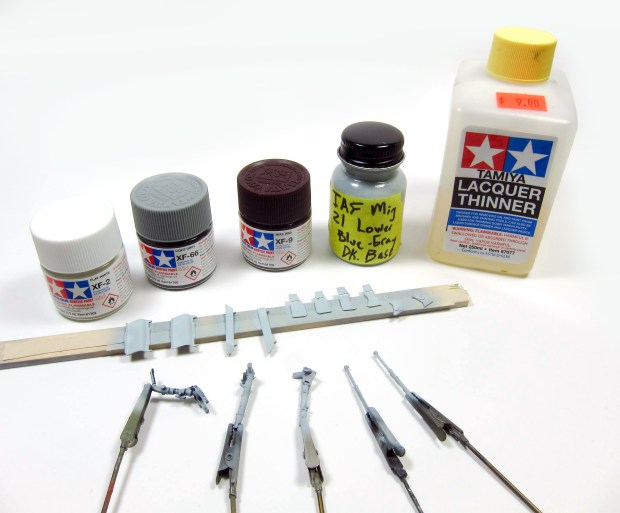
Then they were airbrushed, along with the Brassin gear doors, a custom light gray color.
img_6520-copy

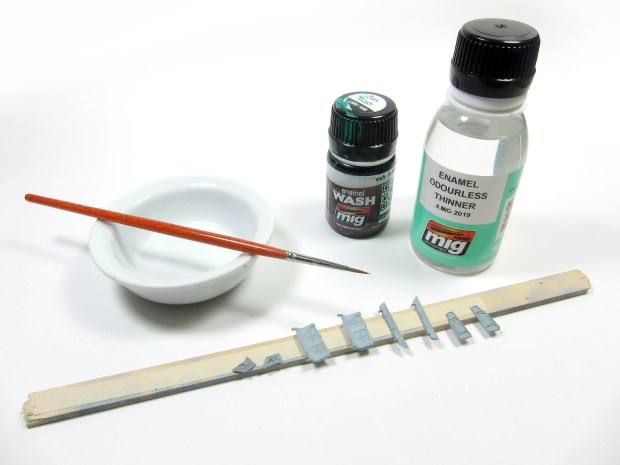
An enamel wash was prepared and applied…
img_6523-copyimg_6533-copyimg_6598-copyimg_6702-copy

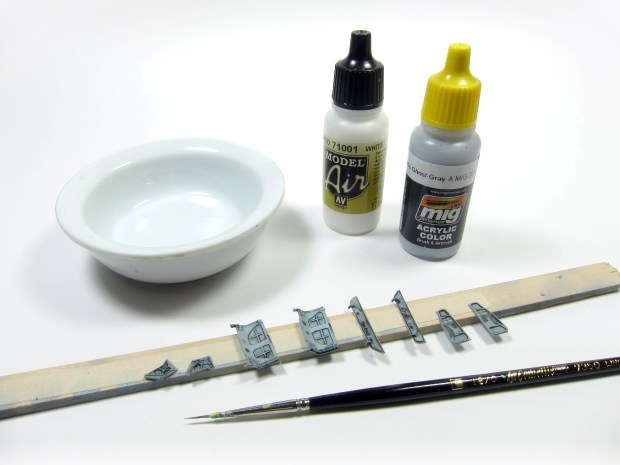
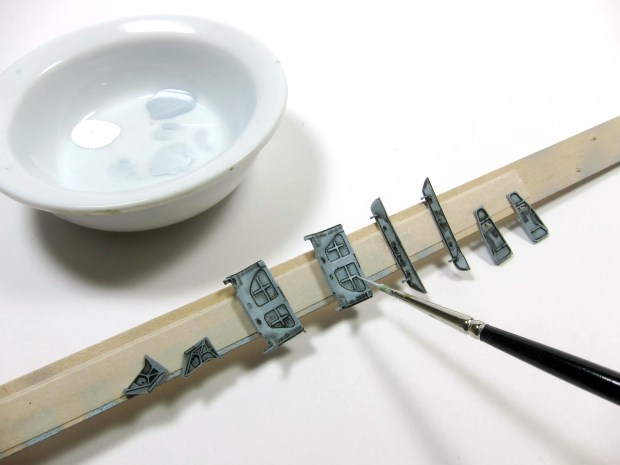
and acrylics were mixed and applied with a very fine brush to simulate scratches. The idea behind these scratches was that the accumulated dirt was scraped or scratched, revealing the original paint, and not the typical paint scratched away to reveal aluminum.
img_6708-copyimg_6725-copy

img_6755-copy

The fuselage halves were glued together, stopping at the wing cutouts, leaving the forward fuselage unglued to facilitate insertion of the cockpit parts later. The exhaust area seam was eliminated and structural details were added using styrene.

img_5713-copy

Additional engine exhaust details were added using custom made photoetch and Quickboost parts.

img_20150815_125617-copy

After the exhaust was completed,  the cockpit was finished and inserted into the forward fuselage, then the forward fuselage halves were closed up.

img_6279-copy

Quickboost instrument panelimg_6399-copy

Canopy prep was next. Eduard masks were used. Using two sets allows you to apply one set to the inside of the clear parts to mask and spray the interior Soviet blue-green before moving on to the exterior colors later. Before masking, the clear parts were dipped in Future, which was then allowed to cure overnight.

mig-21-peter-hamann_issue2_chipping_05

The Eduard masks were applied and the exteriors of the clear parts were protected with Tamiya masking tape. Then the interior blue-green was sprayed.

mig-21-peter-hamann_issue2_chipping_06

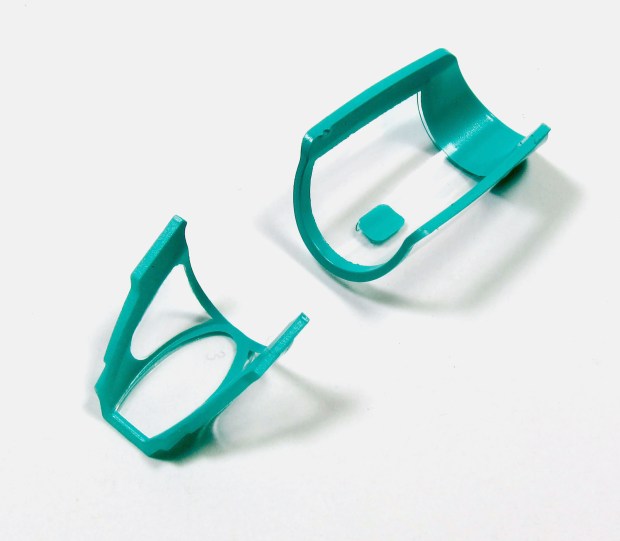
The masks were removed to reveal the blue-green framing.
mig-21-peter-hamann_issue2_chipping_07

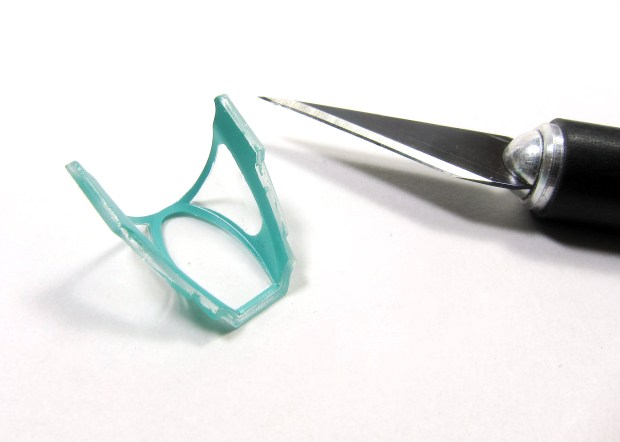
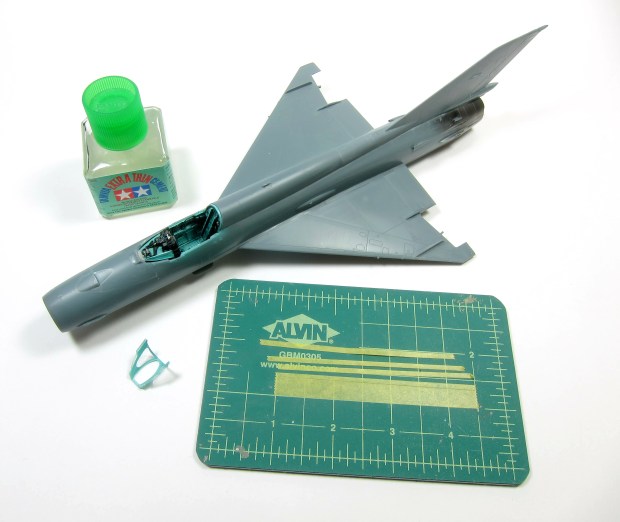
Tamiya Extra Thin Cement was used to attach the windscreen, since it dries very fast and forms a permanent mechanical bond. Before the windscreen could be properly bonded however, the paint needed to be carefully scraped away from the mating surfaces.
mig-21-peter-hamann_issue2_chipping_08

Strips of Tamiya masking tape were cut to hold the windscreen on while the joint set up.
mig-21-peter-hamann_issue2_chipping_09

The windscreen was set in place and the stock Tamiya cement brush was touched to the joint, allowing capillary action to draw the cement into the joint.

mig-21-peter-hamann_issue2_chipping_10

The tape strips were applied and left for a few hours while the windscreen joint cured.

mig-21-peter-hamann_issue2_chipping_11

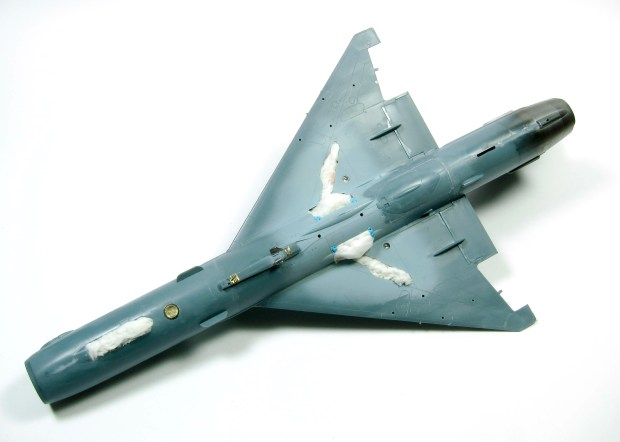
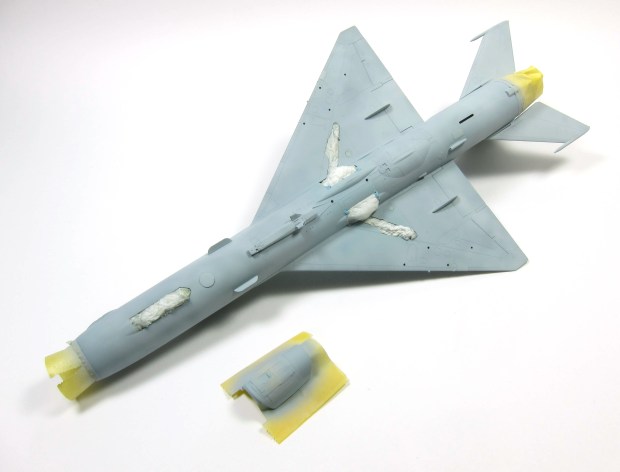
Wheel wells were masked off using tissue paper dampened with water. The areas around the wheel wells were pre-painted, before assembly, with the aircraft underside color (a custom-mixed approximation of FS36375 Light Ghost Gray) to make it easier to paint and mask around the wheel wells at this stage.
mig-21-peter-hamann_issue2_chipping_12

The model is ready for paint application. Note the almost complete absence of filler putty and sanding. Only a tiny amount of Mr Surfacer 1000 was used here and there to fill hairline gaps. The Mr Surfacer was rubbed away with a cotton swab dampened in Mr. Color Thinner. Some light sanding was done around the windscreen base.

mig-21-peter-hamann_issue2_chipping_13

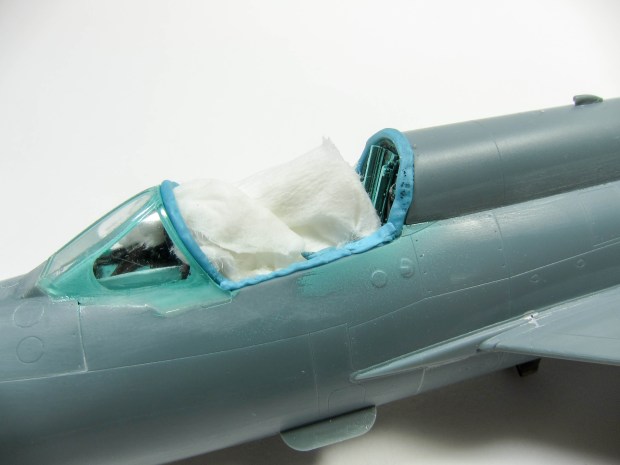
The Eduard kit comes with several canopy options and so a spare one of these was used for masking the cockpit. A small roll of Blu-Tak was rolled and placed around the canopy sill, pressing it down solidly with a dull toothpick.
mig-21-peter-hamann_issue2_chipping_14

The spare canopy was firmly pressed in place and the edges of the Blu-Tak were manipulated to make sure that the edges of the fuselage that needed the final colors were exposed fully.

mig-21-peter-hamann_issue2_chipping_15

The canopy exterior was masked using the Eduard set. The previously-painted interior was protected with Tamiya masking tape. The Green areas of the airframe were also sprayed at this time, using a custom mix of Tamiya colors, thinned with Tamiya Lacquer Thinner to make sure it adhered well to the bare plastic. At this point, the previously-painted exhaust area was also protected using Tamiya masking tape.

mig-21-peter-hamann_issue2_chipping_16

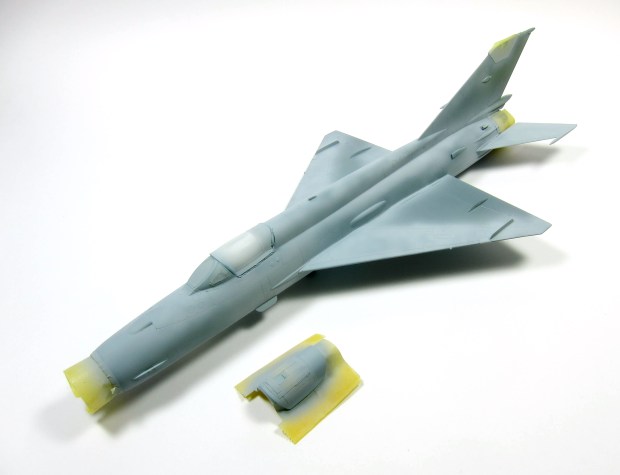
The gray base coat was applied to the upper surfaces using a custom mix of Tamiya colors, thinned with Tamiya Lacquer Thinner to help make sure it adhered well to the bare plastic.
mig-21-peter-hamann_issue2_chipping_17

The gray base coat was applied to the lower surfaces using a custom mix of Tamiya colors, thinned with Tamiya Lacquer Thinner to help make sure it adhered well to the bare plastic.
mig-21-peter-hamann_issue2_chipping_18

The airframe number recognition markings need to be applied to the bottom surface before basic weathering can be applied to the base gray, so a localized application of Future prepped the appropriate area of the wing lower surfaces for decals.

mig-21-peter-hamann_issue2_chipping_19

Future was also locally applied to the vertical stabilizer in preparation for the aircraft markings that will be added there before the camouflage is applied.

mig-21-peter-hamann_issue2_chipping_20

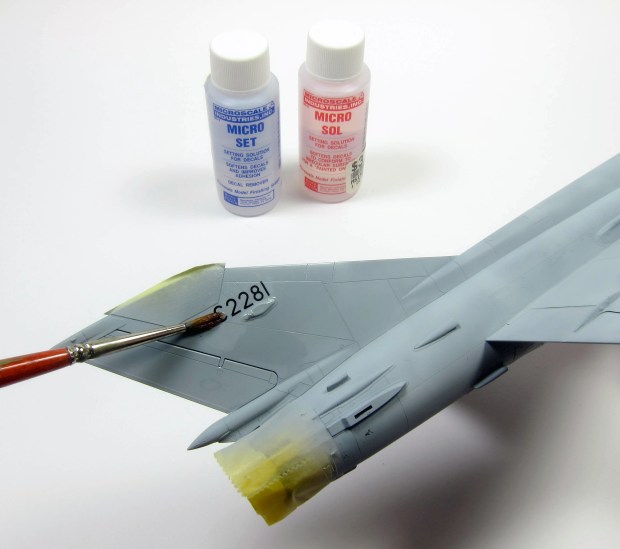
The aircraft number decal was placed using Micro Scale Micro Set and Micro Sol, per the manufacturer’s directions. Apply the Micro Set to the area where the decal will be applied, then apply the decal and pat down. Follow up with a small amount of Micro Sol applied to the decal. I usually wait until I have a few decals in any one area before I apply the Micro Sol, as it softens the decals and makes them very fragile until the they settle back down and the Micro Sol dries completely.
mig-21-peter-hamann_issue2_chipping_21

Some slight weathering (in the form of accented Chipping) was added to the tail marking using Ammo A.MIG-1008 Dark Wash and Odourless Enamel Thinner A.MIG-2019.

mig-21-peter-hamann_issue2_chipping_22

The wash was applied broadly using a brush.

mig-21-peter-hamann_issue2_chipping_23

After allowing the wash to dry, it was wiped away with a cotton bud dampened with the odourless thinner.

mig-21-peter-hamann_issue2_chipping_24

After the wash was thoroughly dried, a flat clear was applied to seal the decal and to flatten the sheen (in this case: Pollyscale Flat Finish)

mig-21-peter-hamann_issue2_chipping_25

 At this point, I decided that more contrast between the various gray panels was needed. I mixed a lightened shade of the base gray and sprayed it onto certain panels that would be visible after the general chipping stage.

mig-21-peter-hamann_issue2_chipping_26

I also applied some light streaking to vertical surfaces just to add some visual detail to those areas, assuming I would chip them more heavily. This ended up not being the case in the end.
mig-21-peter-hamann_issue2_chipping_27

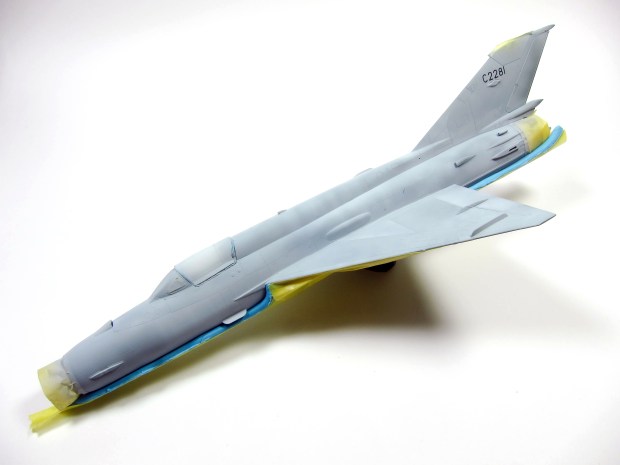
Preparation for the camouflage overspray commenced with masking the lower gray surface demarcation with a roll of Blu Tak. Broader areas were filled in with Tamiya masking tape.

mig-21-peter-hamann_issue2_chipping_28

A HEAVY application of chipping fluid was applied per the product instructions. 2 applications were made in anticipation of heavy chipping. Every step after this one had to happen quickly and in rapid succession. A long evening of free time was set aside so that I could move uninterrupted through the process. I feel that this is critical to this type of finish.

mig-21-peter-hamann_issue2_chipping_29

While the chipping fluid was drying, the camouflage colors (XF-57 and XF-51) were prepared using out-of-the bottle Tamiya colors that were determined to be a close match to reference photos. Due to the fact that I didn’t want them to adhere too well, I thinned them with a slightly higher than normal ratio of Tamiya X-20A thinner.

mig-21-peter-hamann_issue2_chipping_30

A thin and dry coat of the tan color (XF-57) was applied first. By “thin and dry” I mean that the paint was thinned a bit more than I normally would, and that it was applied using a higher pressure than normal, in a thinner layer than normal, only until sufficient opacity was achieved.

mig-21-peter-hamann_issue2_chipping_31

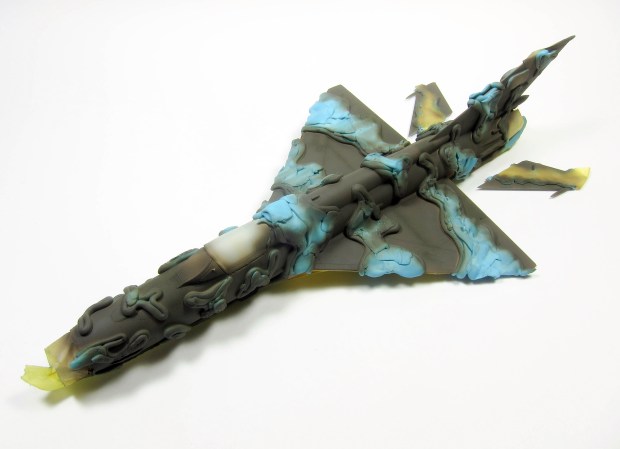
Masking of the camouflage was done using Blu Tak rolled into “snakes” and pressed in place per reference photos. After the outlines were established, I filled in the shapes with bits of Blu Tak stretched into small sheets. After the shapes were established and filled, I went back over the masking to press small inside corners tighter against the fuselage to avoid excessive overspray under the edges of the Blu Tak where it spanned inside corners. The next color (Tamiya XF-51) was mixed for spraying.

mig-21-peter-hamann_issue2_chipping_32

The Tamiya XF-51 applied using the same mixing and application approach as the previous tan color.
mig-21-peter-hamann_issue2_chipping_33

The masking removed. and some subtle panel accenting added using the same Tamiya paints.

mig-21-peter-hamann_issue2_chipping_34

This is where you will begin to see if your application approach was properly executed, and where you must work quickly and attentively. A small but stiff old brush was dampened in water and areas of the airframe most prone to chipping (according the my reference photos) were “attacked” in a probing manner. A bit of investigation is useful here, as you will find that some areas will naturally chip more readily than others, and using the same pressure and aggressiveness on the whole model will yield different results in different areas. The result could be an uncontrolled and unrealistic appearance. You really want to work to achieve control and not a haphazard appearance. Learn to “read” what the paint is doing as you apply water, as you first begin to scrub at the paint, and as the paint begins to come off. Manipulation of these various micro-stages will allow you to achieve the most realistic results.

mig-21-peter-hamann_issue2_chipping_35

Results after the chipping session. Note the focus around the cockpit and wing leading edges. Apparently this is where these Migs shed the most of their camouflage.

mig-21-peter-hamann_issue2_chipping_36

Results after the chipping session.

mig-21-peter-hamann_issue2_chipping_37

Results after the chipping session.

mig-21-peter-hamann_issue2_chipping_38

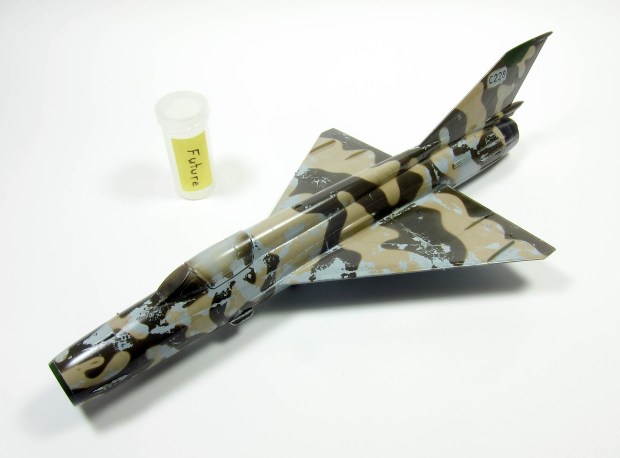
Results after the chipping session.  In hindsight, my application of the green color was a little bit too sturdy, and it resisted chipping until well after the adjacent tan areas were long scrubbed away. In this case, I was still able to manipulate the finish to my satisfaction, but I learned something for next time: multiple layers of paint over chipping fluid will make each layer a little more tenacious, so they need to be adjusted accordingly.

mig-21-peter-hamann_issue2_chipping_39

Future was applied In preparation for decaling and weathering.
mig-21-peter-hamann_issue2_chipping_40

Future was applied In preparation for decaling and weathering.

mig-21-peter-hamann_issue2_chipping_41

 Aeromaster sheet 48-240 “Flashpoint Fishbeds” supplied decals for the Indian Air Force example I was modelling. The instructions and decals represented the airframe I was modeling, prior to the application of the camouflage.

mig-21-peter-hamann_issue2_chipping_42

Decal application in progress using Micro Set and Micro Sol.

mig-21-peter-hamann_issue2_chipping_43

Decal application completed.

mig-21-peter-hamann_issue2_chipping_44

Decal application completed.

mig-21-peter-hamann_issue2_chipping_45

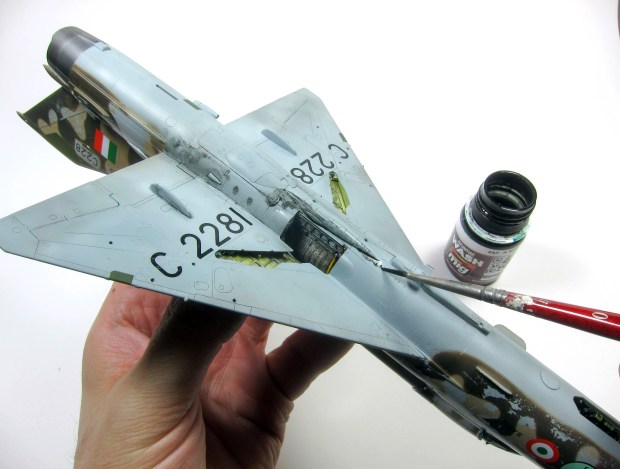
Overall airframe weathering commences with a pin wash on the lower surfaces. In this case I used a varied application of Ammo A.MIG-1008 Dark Wash, AK Interactive AK 121 OIF & OEF U.S. Modern vehicle washes, along with the Ammo A.MIG-2019 Enamel Odourless Thinner.

mig-21-peter-hamann_issue2_chipping_46

The wash is applied using a medium brush.
mig-21-peter-hamann_issue2_chipping_47

I tend to start out being a little sloppy with the application of the initial wash.

mig-21-peter-hamann_issue2_chipping_48

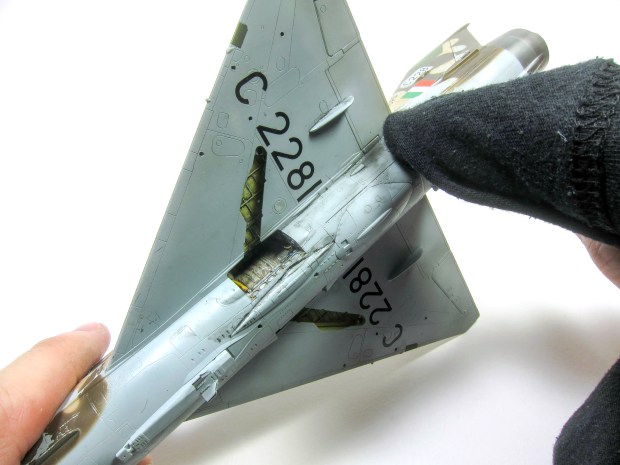
After allowing the wash to dry, a soft cloth (in this case an old T-shirt) is used to wipe away the dried wash.
mig-21-peter-hamann_issue2_chipping_49

A finer brush is used to go back and apply very local detail washes in details and areas where dirt and grime would accumulate.

mig-21-peter-hamann_issue2_chipping_50

The process is repeated for the upper surfaces using the darker Ammo A.MIG-1008 Dark Wash.

mig-21-peter-hamann_issue2_chipping_51

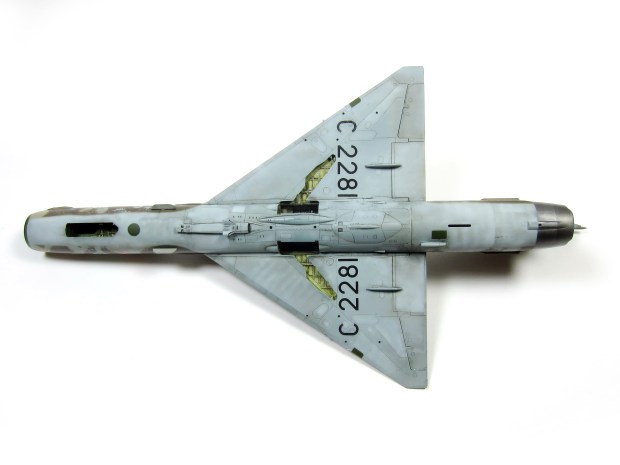
Selected panels and rivet lines were accented using a lightened shade of the underside color.
mig-21-peter-hamann_issue2_chipping_52


After the wash application process, a coat of Pollyscale Flat Flat Finish was applied.
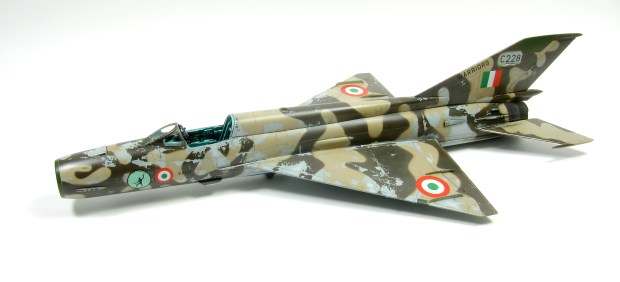
mig-21-peter-hamann_issue2_chipping_54

The model after applying washes and flat clear coat.
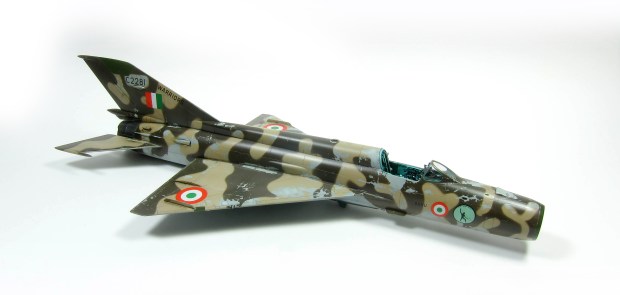
mig-21-peter-hamann_issue2_chipping_55

The model after applying washes and flat clear coat.

mig-21-peter-hamann_issue2_chipping_56

Final assembly took only an hour or so. All parts were added using thick CA glue.

mig-21-peter-hamann_issue2_chipping_57

mig-21-peter-hamann_issue2_chipping_58

mig-21-peter-hamann_issue2_chipping_59

mig-21-peter-hamann_issue2_chipping_60

mig-21-peter-hamann_issue2_chipping_61

mig-21-peter-hamann_issue2_chipping_62

mig-21-peter-hamann_issue2_chipping_64

mig-21-peter-hamann_issue2_chipping_65

mig-21-peter-hamann_issue2_chipping_66

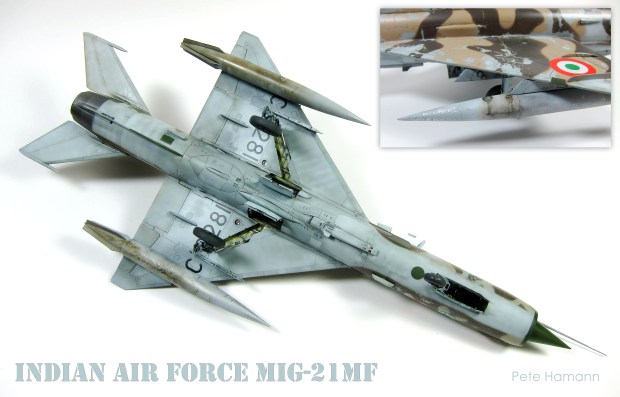
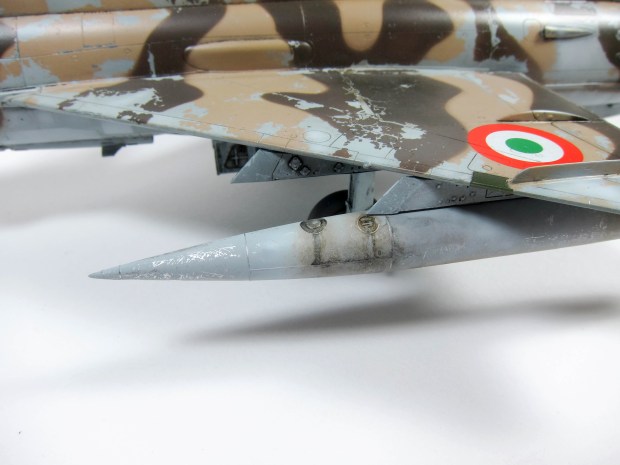
The chipped paint on the external fuel tanks was achieved by base-coating with Testors Model Master Metalizer Buffing Aluminum which was allowed to dry and then overcoated with a thin layer of the base gray. As soon as the gray was dry, a paint brush handle was dragged around areas of the fuel tank that would be subject to contact with ground crews. Then a detail  wash of Ammo A.MIG-1008 Dark Wash was applied with a fine brush and allowed to dry without removing after it dried. An airbrush was then used to lightly “dust” the area with the same product to simulate previously cleaned fuel spills and staining.
mig-21-peter-hamann_issue2_chipping_67

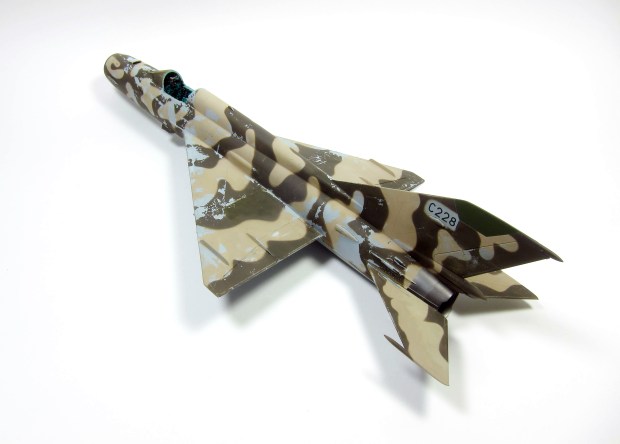
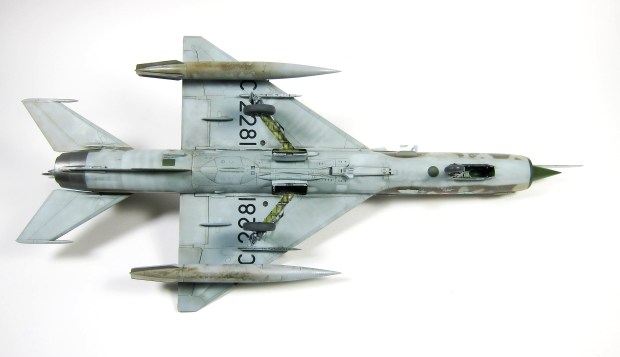
View of the underside of the finished model.

mig-21-peter-hamann_issue2_chipping_68

View of the underside of the finished model.
mig-21-peter-hamann_issue2_chipping_69

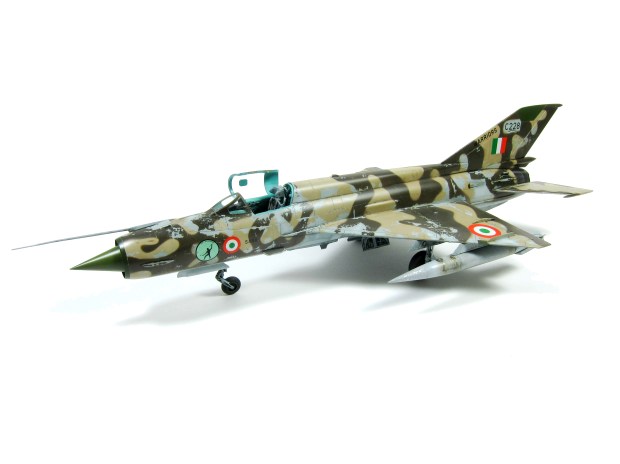
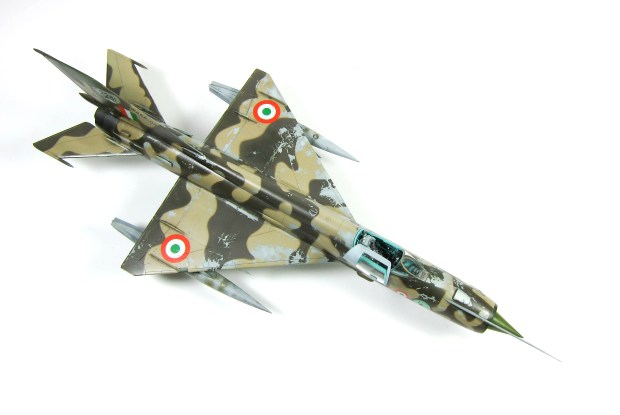
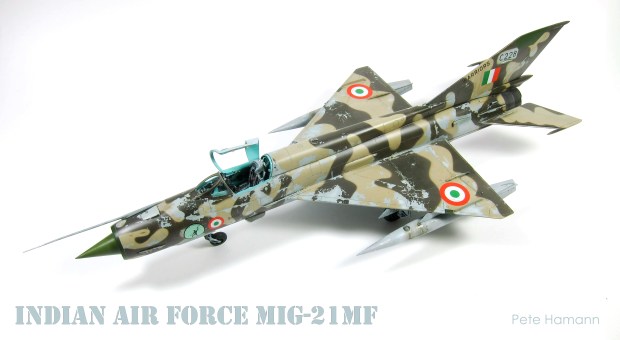
View of the finished model.

mig-21-peter-hamann_issue2_chipping_70

mig-21-peter-hamann_issue2_chipping_71

mig-21-peter-hamann_issue2_chipping_72

topside-1

underside-1

Asociación de Modelismo Alabarda – Flying Tigers figure

It’s been a while. Too long in fact.

Let’s just start out by saying that I lost ALL of my photos from the trip to the show in Leganes. Let that sink in…

ALL, as in “every. single. one.” of the pics that I took, of the show, of the models, of the food and sights, but most importantly of the people. All of those photos disappeared forever when the Micro SD card that I was recording them on went belly up the night before we headed back to the States. It was heart breaking, but also an opportunity to practice letting go. That might sound a bit melodramatic, but it’s something I’m working on as a person: not becoming attached emotionally to things. It’s the memories, after all, that give meaning to the photos.

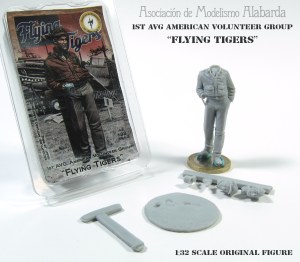
I did pick up a few things (to which I am NOT emotionally attached, I might add) and this is one of them. Every year for the Leganes show, Asociación de Modelismo Alabarda releases a figure for sale only at the show. This year it was a Flying Tigers pilot in 1:32 scale, AKA 54mm. It’s a great figure and dovetails nicely with my interest in aviation subjects, so I snagged one. then I snagged four more to offer for sale. These guys (Asociación de Modelismo Alabarda) only sell at the show, and I thought that it was such a cool figure that it’s a shame it is only available to such a limited audience, so I bought 4 extra figures to offer to my online friends.

The price is $14.95 plus shipping from Seattle, WA

Take a look at the pics and drop me a note if you’re interested.

Cheers!

figure overall copy

figure overall-2

figure details 1 copy

See you in Leganes!

Model packed, SD cards emptied, camera batteries charged!

Madrid, here we come! Stay tuned for a full show report from the 5th Concurso Modelismo Estatico, Ciudad de Leganes (or what I am going to start referring to as “The Spanish Nationals” (though I may catch alot of grief from my Spanish friends for that).

I can’t wait to see all of my friends (new and old) consume many cañas, buy way too much model candy and just generally have an awesome time.

See you soon!

pabellon

CMEL 2015

Academy Merkava MkIID 1:35 scale

build update 09-01-2014
I stumbled across this Academy kit at my local hobby shop a few weekends ago. I’ve always liked the looks of the Mk1 through III Merkavas (the MkIV looks too much like a “Box on tracks” in my opinion), and with the IID containing a mix of MkII and MkIII feautures, heavy combat use, and an MSRP of only $45, it became an instant “must-have”!

I blew through most of the basic construction and parts cleanup in a couple of sessions. One of my deviations from the strict “out of the box” plan included chopping the skirts up for a more organic appearance. Merkava skirts are split into paired sections of 2 skirt segments, with each section mounted to the hull on a spring steel frame. These sections are free to move, mostly independently from adjacent sections, resulting in non-planar orientations of all sections. To me this is one of many small “tells” that help to add liveliness and realism to a scale model, and it’s fairly easy to incorporate.

I started by labeling each of the backsides of the various segments (L-1, L-2, L-3, R-1, R-2, R-3, etc…) to help me relocate them during final assembly. Then I cut small slits at the skirt segment breaks in the backside structure, so it would be easier to snap the segments apart after scoring the visible side with a sharp blade. After the segments were separated, I cut away the rubber portions and replaced them with slightly beat-up styrene versions.

SKIRT CHOP

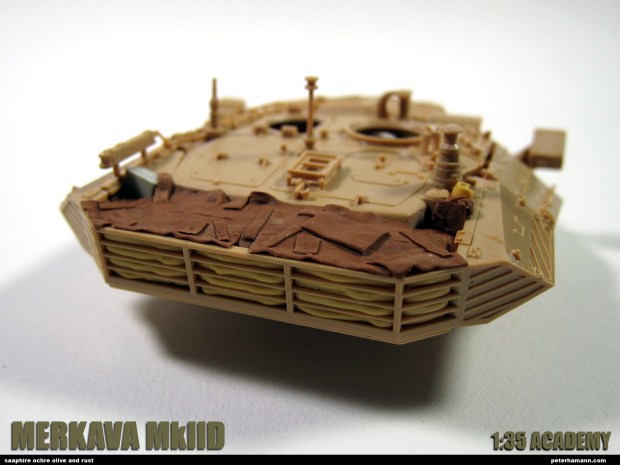
General assembly commenced and was progressing nicely when I came to the turret and a big fat empty hole where a bunch of tanker stuff should go: The Bustle. Pictures of the area were hard to come by, and what photos I did find showed that the area was often covered by a cloth cover. I also found images of Legend Production’s Merkava MkIID detail set, which includes, among other things, a very nicely rendered cloth turret basket cover. I really didn’t want to spring for the full set, and I have always felt that soft goods is an area I struggle with, so what better opportunity to develop my sculpting skills? If I succeeded I would be rewarded with many Facebook “Likes”. If not, I could shelve the beast and move on to something else in the stash. I used photos of the Legends parts as reference and busted out my collection of epoxy putties.

I started by replicating the vertical element of the cover, inside the back face of the basket, with Tamiya epoxy putty. After that cured, I filled the bulk of the basket with a chunk of foam, then packed the rest with some really old Miliput Terra Cotta that was getting quite hard and unusable for finer work. I added some rolled up blankets made from Miliput and Tamiya epoxy putties to one of the corners, and a .50 Cal ammo can to the other corner. After all of that had cured, I rolled some of the Terra Cotta putty flat and added some “structure” underlays that would peek through the final top layer.

BASKET TARP UNDERLAY V02

BASKET TARP UNDERLAY 2_V02

The top layer was made with Tamiya epoxy putty rolled very thin on a cutting board dusted with talcum powder. The Tamiya epoxy putty accepts detail well and cuts nicely if you press straight down on it. I added details and straps with the tip of an old Micron pen, from which I have removed the felt nib.

BASKET TARP TOP LAYER_V02

BASKET TARP TOP LAYER 2_V02

Next I will follow roughly the same process to model the rear hull stowage boxes.

STAGE 1 ASSY

Thanks for looking. Now go build something!

Pete

30 Years of Military Vehicles in Lebanon – Samer Kassis

OVERVIEW

Lebanon has seen it’s share of conflict through the ages, and the 20th century was certainly no exception. During the last half of the 20th century and early into the 21st, the cities, towns, valleys and mountains of this small Mediterranean country witnessed more than their fair share of armed vehicle traffic. Samer Kassis of Lebanon has been there all along, collecting images of the vehicles and people who have played a role in the history of this storied land. After years of gathering and curating images, Mr Kassis has published a series of books documenting the various military vehicles that have rumbled and rolled the dusty street and roads of Lebanon.

30 YEARS SAMPLE 1

30 YEARS SAMPLE 2

30 YEARS SAMPLE 3

30 YEARS SAMPLE 4

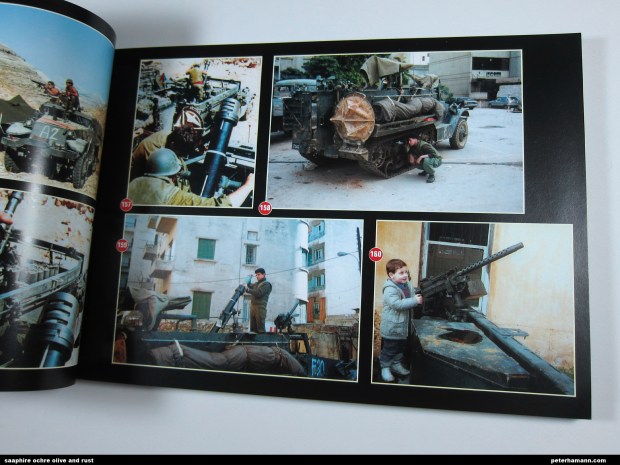
The book is a 2 volume “set” composed of the main volume, which is entirely photographs, and the second, smaller volume, which contains the captions for the photos in the main volume. The main volume contains 195 pages of mixed black and white and color photos. This is not a detailed walk-around book, but more of a “time and place” type of book, with the images grouped by military unit and conflict.

The subject matter ranges from the mundane to the fascinating, with the emphasis on fascinating! There are images of vehicle types and local modifications that you have almost certainly never seen, let alone heard of. Along with armored vehicles there are images of artillery in action and in various states of disrepair, as well as civilian vehicles and their operators in various states of uniform dress.

If you are interested in Middle-Eastern military conflict, Lebanon, obscure hardware, and oddball military vehicles, this book is a must have. If you’re looking for unusual diorama subject material or inspiration, I can also thoroughly recommend this book.

Available directly from the publisher at elitegrplebanon or via a number of international dealers listed at the link given.

Painting Guide for AFV of World War Two and Modern Era

COVER-1

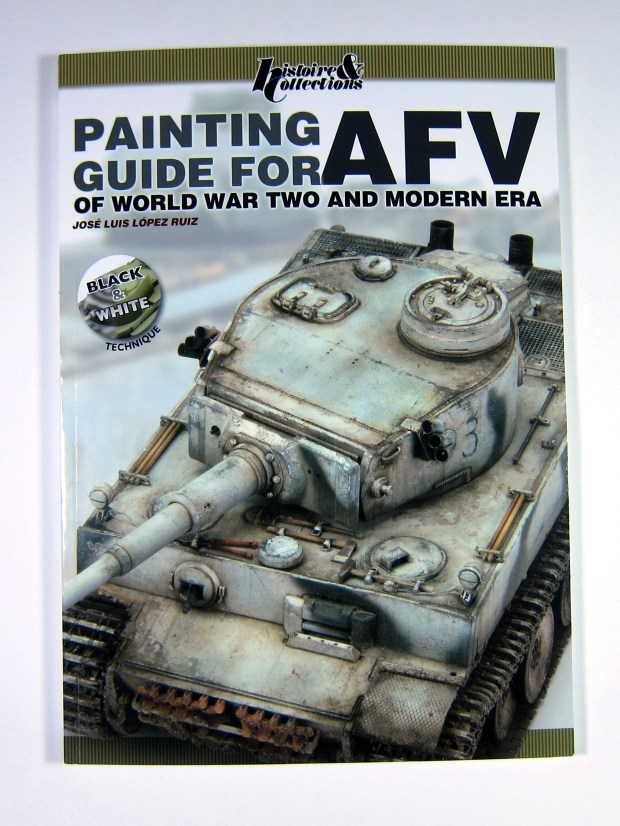
Jose Luis Lopez Ruiz is a name that you’re probably familiar with if you’re an active armor modeler who is up to date on the various finishing techniques used today. His pioneering use of the “Black and White” technique was a real eye-opener for modelers used to following a fairly standardized process of color application and weathering.

Histoire & Collections of France has released “Painting Guide for AFV of World War Two and Modern Era” (ISBN 978-2-35250-387-3 ) which features step-by-step chapters detailing the application of the Black and White technique to 5 models in 1:48 and 1:35 scale. Published in English, well-illustrated and captioned, and written in a relaxed style that could make even an auto service manual fun to read, “Painting Guide for AFV of World War Two and Modern Era” is an invaluable resource for experienced modelers looking to try new techniques, as well as beginning modelers who are trying to unlock some of the more basic mysteries surrounding various concepts and finishes used on pieces that they may have admired in forums and magazines.

MATERIALS

TABLE

TIGER

1098

B2

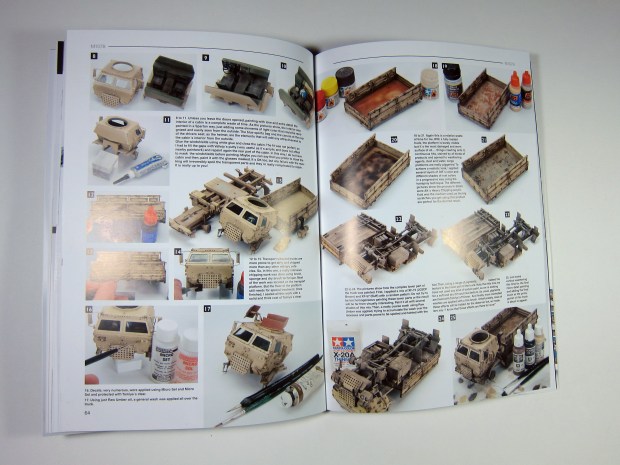
I feel compelled to point out that this book is not limited to step-by-step chapters, but also features some great stand-alone tables and tips. The first 9 sub-chapters are dedicated to particular aspects of AFV finishing: Primers, Paints, Washes, Oils, Varnishes, Pigments, Special Products, Airbrushes, and the Classical Method of painting AFV models. After that, the book turns to an SBS format detailing each of the featured subjects, which thankfully extend beyond the typical German WWII subject and include the following: 1:48 Char B in German service, 1:35 BT-7, Tiger 1, M-1078, and Tiran 5. The armor subjects are not limited to those however, as there is also an extensive chapter devoted to an introduction to the Black and White technique that features Jose Luis’s well known T-55 Enigma in 1:35 scale. The book finishes off with a gallery of 14 models.

One intangible aspect of the book that I absolutely love are the “hidden gems” throughout the text. Concepts like the use of the under-painting steps as a way to sketch the finish in the early stages, while the finish is still in development, are the kind of breakthrough concepts that make a book like this more than worth the purchase price. Jose Luis encourages the modeler to loosen up and embrace risk, echoing admonishments from instructors during my art school days when I struggled to “Stop thinking like an engineer all of the time!” as one teacher advised during a critique. Maybe that’s why Jose Luis’s writing seems so familiar to me. While he definitely encourages the reader to study photographic references and to think logically about the what’s and why’s of various materials and processes, there is a relaxing quality to the writing that encourages exploration and development without fear of “screwing it up” – a tough sell for a modeler who’s just spent months of free time gluing and soldering tiny bits of expensive resin and brass to a $60 plus kit! But like a good teacher, Jose Luis reminds the reader that self-confidence and faith are equally important additions to the modelers tool kit, and that the whole point is to have fun!

In the end, it’s hard to argue with his results.

82 full-color pages, richly illustrated and printed on heavy matte paper. Highly recommended!

Available directly from HISTOIRE & COLLECTIONS

or from AMAZON

*Share this post on facebook to be entered to win a cop of “Painting Guide for AFV of World War Two and Modern Era”

Sunday, August 3rd at 6PM Eastern, I will pick one name at random from the list of people who have shared this post, or the Facebook link to this post. That winner will receive a copy of the above title absolutely free!

Thanks for looking – now go build read something!

MacOne Spanish Civil War photo-etched paint mask

MacOne Models comes to the aid of the Spanish Civil War modeller again with this handy etched fret that provides paint masks for various Spanish Civil War tank markings. I don’t know why one couldn’t use to for applying markings to buildings as well.

Product number: MAC35103
Scale: 1:35
Photo-etched brass

MACONE GCE SIGNS MASK

Available for about $10 US (exchange rate as of 14-06-2014)directly from MacOne models

http://www.maconemodels.com/venta/index.php?id_product=49&controller=product&id_lang=3

Thanks for looking. Now go build something!

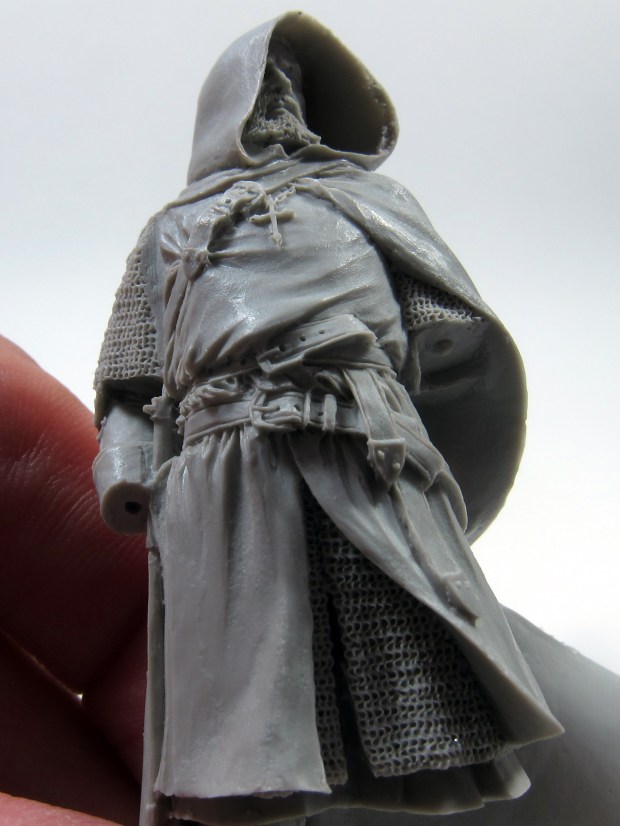
NOCTURNA MODELS TEUTONIC KNIGHT

Nocturna Models of Madrid Spain is one of the most exciting figure producers around. Still a relatively young company, but one whose catalog is ever expanding, Nocturna represents a younger type of figure model studio that incorporates more stylized and artistic themes, while still apparently maintaining a connection to more traditional, historically based, figure producers with a solid footing in the classical sculpting and painting arts.
When I saw their 70MM Teutonic Knight figure at a show in Madrid, it struck me as one of the most interesting pieces I had ever seen. Even though figure modelling isn’t really my “thing” I had been rolling around a concept for a diorama in my mind and I knew that this figure was perfect for it. I’ll share the concept later if I can get it fleshed out to the point that I think I can execute it successfully, but for now I wanted to share a few images and thoughts of this incredible figure.
In keeping with one of the repeated themes of this blog, this isn’t a review, as much as it is an opportunity for anyone who might be interested, to see what you get for your money. I should point out that I acquired this figure at my own expense.

Packaging is, as are all of Nocturna Models releases, top notch!
PACKAGING 1

PACKAGING 2

The parts are clean and very well cast. You can see some small bubbles (2 total on the entire figure) inside the banner, but they are not visible on the surface.
PARTS 1

Details!
DETAIL 1

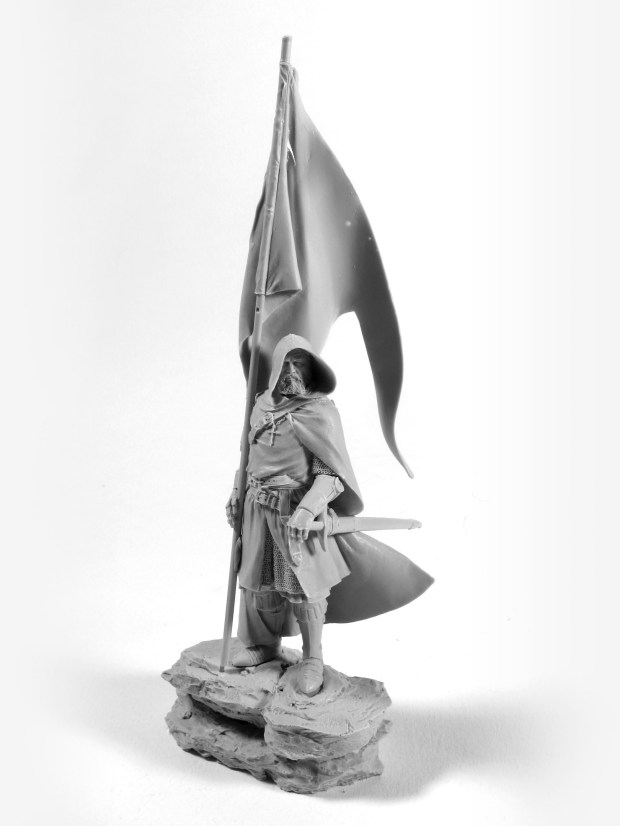
Nice pose. Dynamic while not your typical “in-action” pose.
DRY FIT 1

The dry-fit assembly in the last image is the result of about an hours worth of cleanup and assembly. I added magnets to the joints to allow me to disassemble the figure for painting, which added some time beyond normal cleanup (which was minimal). Mold parting lines were very minor and the joints were self indexing and well-fitting.
A metal rod is cast into the flag pole / spear to lend some strength to the joint with a corresponding hole cast into the mating part. Nice touch!

I can fully recommend this figure to anyone. Clean casting, ease of assembly, excellent packaging and great customer service from Nocturna Models mean that I will be back for more in the future.

You can order directly from their website at

Now, go build something!

Spanish Hornets! Series Españolas Decals

Currently being replaced by the new E and F model F-18’s in US Navy service, Legacy Hornets continue to serve capably in the air arms of the Hornet’s export operators, including Switzerland, Australia, Finland, Malaysia, and the subject of this entry – Spain.

The Spanish Air Force, or Ejercito del Aire “EdA” has operated the F-18A+ and B+ models (similar to the C and D models in US service) known locally as the C.15 and CE.15 respectively, since 1985. Spanish Hornets and their crews have seen combat action in the skies over the former Yugoslavia, and have flown in support of no-fly zones over Libya.

Spain’s 86 Hornets are divided among two main air wings: ALA 12, based at Torrejon Air Base near Madrid, and ALA 15, based at Zaragoza.

Modelers wishing to build a legacy hornet in a non-US finish are offered some interesting options by the Spanish company Series Españolas Decals.

Both Air Wings or “ALA”s are covered by this decal offering, in 1:32 scale (Product #1232) with generic numbers given to allow some freedom in modelling individual aircraft. A similar sheet is also available in 1:48 (#1248) and 1:72 (#1272) scale.

The decals are well printed and in register, with even the tiny stenciling being legible.

1232_F-18s

1232_F-18s-decals

The price tag on the sample shown is due to the fact that I purchased the decal sheet with my own funds from a Spanish hobby shop while attending a model show.

Series Española Decals continues to expand their line, and the quality is constantly improving. I have some of their older sheets, much older…and I can honestly say that the quality of their current offerings is light years ahead of those old sheets. I don’t know for sure, but I assume that they are having their decals printed by one of the powerhouses of the decal manufacturing world, based on the sharpness, clarity, thin-ness, and overall quality. The only drawback so far is their limited availability. Currently only available from overseas shops, or directly from Series Española Decals, they can be a little hard to come by, but are invaluable if you want to build anything Spanish. They offer decals for other Spanish types like F-5’s, T-6’s, Eurofighter Typhoons, F-18’s, T/AV-8A/B Harriers, R/F-4C’s and much more, which I will be posting here soon so stay tuned!

You can purchase them directly at Series Española Decals website.

or through various online retailers like Carmina Hobbies.

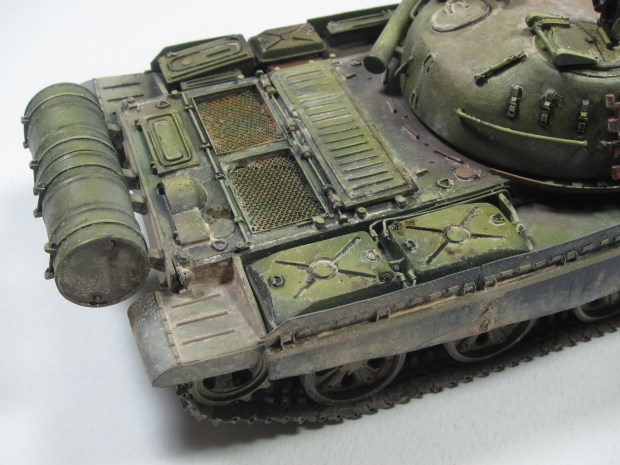
T-62 Afghanistan 1983 completed.

Thanks again to Jose Luis Lopez Ruiz for his generosity and hospitality. This project was a kick from the beginning and I can’t wait to build another 1:48 scale kit – especially if it’s resin!

I added the supplemental turret armor using printed track links that I modeled in CAD. They were cleaned, primed and painted using the same paints and techniques that I use on resin and plastic parts.

tracks process copy

Weathering was applied using a combination of AK washes, various pigments, oils and acrylics to represent dried mud, dust, oil, and rust.

IMG_8629

IMG_9034 copy

The base was constructed from styrene sheet and Durham’s Water Putty. Some limited coloration was added with AK washes and Vallejo acrylics. This was followed with a heavy dusting of the same pigments that were used on the model. After the terrain was finished, Vallejo black polyurethane primer was sprayed onto the lower portion, spraying upward from the bottom, using the top corner as a kind of masking.

IMG_8653 copy

Then the model was finished with a few minor details and added to the base. I should secure it with some type of removable fastener for travelling, as I have a feeling it will be “crossing the pond” some time soon…

IMG_8990

Thanks for following along, now go build something!